Posts

creating and attaching EBS volume in AWS

Image
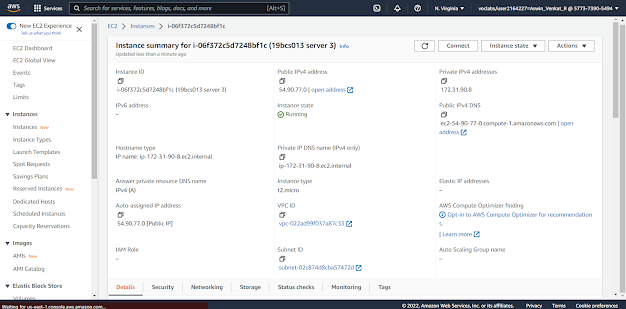
 in this post we will look how to create an ebs volume and attach it to an instance. firstly, create an instance. here is my instance. go to the volumes tab in ec2 dashboard. there is only one volume that is created along with the instance. now click on the create volume button. make sure the region is the same region as your instance and click on create volume. now you can see the new volume in the dashboard. now click on the new volume and go to actions and click on attach volume. select your instance and click on attach volume. connect to your instance. type command 'lsblk' to view your disks in the instance. the volume xvdf is the volume that we created and attached. format your volume to ext4 now you can use your volume and work on it.

Physical to virtual migration

Image
 In this post, we will see how to convert a physical machine into virtual machine. For this task we need to download a tool called Disk2vhd. This tool converts the contents of a disk to a Virtual hard disk (VHD). download the tool in this link. https://docs.microsoft.com/en-us/sysinternals/downloads/disk2vhd now we will look at the steps. Step 1: Open the tool  Step 2: Choose the drive and click "create". Step 3: now that the vhdx drive is created. we have to convert the vhdx drive into a vdi drive. to do that open the terminal under the oracle virtualbox file. Type in the command given below. C:\Program Files\Oracle\VirtualBox ./VBoxManage clonehd <filename>.vhdx <filename>.vdi --format VDI the vdi file will be created from this command. Step 4: open oracle virtual machine. go to settings and go to storage. select the third icon in the bottom right corner of the box and select hard disk from it. step 5: Then add the respective file to it. after adding it will sho...

Lab: Connecting your EC2 machine to a remote computer

Image
 in this post, we will be connecting an EC2 machine to a remote machine. first step is to create an EC2 machine instance which I have shown in the  previous post . this is my instance. Click the connect option in the top right side. make sure that you have your key pair available in your computer. now go to the folder that contains the key in a terminal. the type  chmod 400 keyname.pem then for the next line type the command given for you in the connect section. now you are free to work on the instance. you can use your ec2 instance as you wish.  

Lab: Creating a EC2 instance

Image
in this post we will be creating a EC2 instance. EC2 is a service offered by AWS, EC2 stands for Elastic cloud computing. this service gives the users a cloud server to work on. the user can use the server for computational purposes. For this you need an AWS account. Step 1: Go to the dashboard and click on EC2. in the ec2 dashboard, click on create a new instance. Step 2: give a name for it.  and select an Operating system to work with. Step 3: then select the key pair, and select the default security group. Step 4: configure the storage to your required amount and click on launch instance. now the instance will be launched and you can view the details under the EC2 dashboard. this was the details page for my EC2 instance.

Storage Virtualization

Image
 in this post we will look at storage virtualization. Storage virtualization is when a folder/storage is shared between physical and virtual machines. Step 1: go to settings for the machine. select shared folders. Step 2: Select the add icon and select the folder. Now you can access the folder in the VM.

Amazon Web Services- worksheet 2

Services provided by Aws Cloud.  Services that are available in the AWS Free Usage Tier          750 hours of Amazon EC2 Linux or RHEL or SLES t2.micro instance usage (1 GiB of memory and 32-bit and 64-bit platform support) – enough hours to run continuously each month         750 hours of an Elastic Load Balancer plus 15 GB data processing 750 hours of Amazon RDS Single-AZ Micro DB Instances, running MySQL, MariaDB, PostgreSQL, Oracle BYOL or SQL Server Express Edition – enough hours to run a DB Instance continuously each month. You also get 20 GB of database storage and 20 GB of backup storage          750 hours of Amazon ElastiCache Micro Cache Node usage – enough hours to run continuously each month.          30 GB of Amazon Elastic Block Storage in any combination of General Purpose (SSD) or Magnetic, plus 2 million I/Os (with EBS Magnetic) and 1 GB of snapshot storage     ...

VM Migration

Image
 In this post, we will look at VM Migration. For this we need a Virtual Disk Image which already has a OS installed in it. Step 1:  Right click on the Virtual machine and click Export. Move the OVA file to your other host machine. Step 2:  open the Virtual machine software, in my case I use VM ware Workstation. Step 3:  Click on Open a Virtual machine and Choose the OVA file. Give a name and click on import. Now the Machine is imported. You can work on this machine like normal. It will contain all the data from the previous VM since its an import of it. That is how VM migration is done.